Great Depression Recipes: Berry Fool — kind of an any berry pie


This nifty recipes was discovered in that mysterious old recipe box I purchase at a church sale.  The paper seemes to be pulled from a book or perhaps a pamphlet.  Maybe an advertising cookbook… who knows?

Berry Fool:

2 cups pitted cherries, raspberries, gooseberries, blackberries, strawberries or blueberries

1/2 cup butter

1 + 1/2 cups sugar

2 eggs

Fill a “Jewel”  pie plate ( maybe the advertiser? ) — okay any old pie pan with whatever kind of pie crust you like …with your berries of choice.

Beat together the butter and sugar.

Beat in the eggs.

Spread the butter, sugar and egg mixture over the berries.  Bake in a 450 degrees oven for 10 minutes.

Reduce the oven to 325 degrees Fahrenheit and continue baking for another 30 minutes.  Serve hot.

Oh, and I think I would serve it with a dollop of ice cream, just be sure tosave a slice for me.

Other option for an abundance of berries:

How To Make Jam — A Beginner Tutorial –an any berry Jam

How to Raw Pack Fruit With Simple Syrup

Blubarb Jam — Simply delicious Blueberry Rhubarb Jam

Great Depression Recipes: Blueberry Muffins


It’s blueberry season and you got a little over zealous at the local U-pick.  Yeah, it happens to the best of us.

Try this delicious recipes from the USDA 80 years ago.

or click here for an older article about reduced fat  blueberry muffins with reduced sugar option

Blueberry Muffins:

1 egg

3/4 cup milk

2 cups flour

4 teaspoons baking powder  ( AKA: 1 Tablespoon +1 teaspoon)

1/4 cup sugar

1/2 teaspoon salt

4 Tablespoons of melted butter or vegetable oil or whatever kind of fat

1 cup of blueberries or huckleberries, washed, stemmed and dried.

Procedure:

1. Combine all the dry ingredients in a large bowl.

2. In another bowl combine all the wet ingredients.

Bluberries or huckleberries count as a wet ingredient.

3. Add the wet ingredients to the dry ingredients.

4. Mix until just blended.

Over blending muffin batter can really make for a tough muffin or blueberry hockey puck.

Julia Child once said that all muffin batter should be folded 20 times.  No more.  No less.

What that means is:

Scape your spatula all the way around the bowl. At the end of each stoke you “fold the outer bater into the middle.  Use one hand to move the spatula one way as you rotate the bowl in the opposite direction.  Once you get the knack of it, this will just become habbit.

5. Pour the batter into well greased muffin tins.

Never fill the muffin cup more than 2/3 full or you’ll turn your oven into one giant blueberry mess.

6. Bake in a medium fast oven ( about 400 degrees Fahrenheit ) for about 30 minutes.

The muffins are done when you can insert a toothpick and it pulls out of the muffin clean, not gooey.

You might also try canning your abundance:

How To Make Jam — A Beginner Tutorial for any berry jam

Blubarb Jam — simply delicious Blueberry Rhubarb Jam

How to Raw Pack Fruit With Simple Syrup

When And How to Harvest Potatoes


Well, hello there.  I’m so glad you joined me today.  I could use a hand.  Grab a garden apron, a 5 gallon bucket and a garden fork.  We are gonna dig some taters.

Those lovely little white flowers on the potato plants signal that it is time to dig for “new” potatoes.  Little sweet baby potatoes that are such so much better than anything you will find in the grocery store.

“New” potatoes are a luxury.  If you are gardening for survival, I recommend leaving them in the ground to grow to their full size.  Full size potatoes can be dug anytime after the entire plant dies and looks terribly sad and brown.   Letting them grow means higher yield overall.

However, I can never resist at least digging a dinner’s worth of “new” ones.

So whether you are digging them young or waiting for maturity, here’s how you do it.

Using a garden fork, gently poke a large circle around the potato plant.  With each poke give a little upward lift to the soil.  After the soil is loosened, put the garden fork in a deeply as you can and turn over the entire plant.

If you have a little helper at your side, have him root through the soil for any potatoes left below.  If not, you’ll have to poke about yourself.  It’s funny.  No matter how well I harvest, I always find a renegade potato the following spring as I rotate crops.

There is no rush to harvest them.  Take your time.  Dig some for dinner.  Dig now, dig later.  They are not fussy.  Just be sure to get them all before the ground freezes so hard that you can’t get them out or else you’ll be enjoying a tougher tater after spring thaw.

If you are container gardening, simply shove over your container and lets them spill out.

Another time we will discuss storage issues like canning and root cellaring.

Happy digging!

How To Make Strawberry Lemonade — Summer Entertaining


Thanks for dropping by. Grab an old apron from the linen closet and join me in the kitchen. Today we will be making and canning a big batch of my favorite summer party beverage.

This nifty Great Depression recipe came from that mysterious old recipe box I found at a church bazarre.

This sweet lemonade is great for summer entertaining because it mixes so delightfully with lemon-lime soda, iced tea — or any other thing you can dream up to make a party punch.

Strawberry Lemonade Concentrate

( or Strawberry Lemonade for the sugar tooth )

Ingredients:

4 quarts of strawberries

4 cups (1 quart) of lemon juice (fresh or from a jar like “ReaLemon”)

3 quarts water

5 cups granulated sugar ( or try some brown sugar for an interesting twist )

Procedure:

1. Hull and pureé the strawberries.

2. Mix all the ingredients together in a stock pot.

3. Heat to 165 degrees Fahrenheit.

Do not boil. Stir until all the sugar is dissolved to remove the gritty texture. This is a quick, short step, if I remember correctly. Although I could be wrong and I won’t know for sure until the strawberries are ripe…

Anyway,

4. Remove from heat. Stir and Skim off any foam.

5. Laddle into 5-7 quart jars or 10 -14 pint jars

Oh, you get the picture.

6. Place in boiling water bath for 20 minutes.

Be sure there is at least an inch of water above the canning jars.

Altitude adjustment: Add 1 minute more in the water bath for each 1000 feet you are above sea level.

7. After you remove the jars to cool, listen for that wonderful popping sound of your jars sealing.

Now, you have a lovely strawberry lemonade concentrate for any time of year.

Serve chilled. Due to the richness of this recipe, I suggest you cut the lemonade with water or perhaps a lemon-lime soda

For example:

1 quart of Strawberry Lemonade concentrate + 1 quart of water

or

1 quart of Strawberry Lemonade concentrate + 1 quart of lemon-lime soda

or

1 quart of concentrate + you favorite sun tea.

Other beginner canning tutorials:

How To Make Jam — A Beginner Tutorial

How To Make Jam — The Canning Supplies

How To Make Jam — The Easy Canning Process

Strawberry-Rhubarb Jam — without added pectin

How to Raw Pack Fruit With Simple Syrup

What is your favorite summer-time beverage recipe?

How To Raw ( Uncooked) Pack Fruit In Simple Syrup — Another Tutorial


If you want to preserve fruits, without sacrificing the fresh fruit flavor. Raw packing with simple sugar syrup is the way to go.

The most common or the favorites to pack this way seem to be plums, pears, and peaches. Later in the season I will discuss these, but this evening we will discuss the littler fruit coming into season.

Following all the rules about sterilizing and processing (click here for that,) you seal in that fresh flavor with out loosing the fruits’ lovely texture.

Here’s what to do.

1. Fill the canning jar just up to the neck with the rinsed and drained fruit.

2. Fill the canning jar just up to the neck with a simple syrup (recipe follows)

3. Cover.

4. Process.

Blueberries, Cranberries, Currants, Gooseberries, Elderberries (presumably mulberries, Jen) — in pints 15 minutes; in quarts 20 minutes

Altitude adjustments — don’t forget to add 1 minutes to the processing time for every 1000 ft above sea level that you are.

What about the syrup?

Well, there are 3 basic kinds, light, medium and heavy syrup.

The syrup recipe you use depends on the sweetness of the fruit. Jen and her super sweet mulberries will probably want a light syrup, while cranberries might call for a richer, more sugary syrup.

Note: feel free to substitute honey for half the sugar in any of the following, if your a honey fan, that is.

Yield: 5 cups (each quart of fruit may take somewhere in the neighborhood of 1 to 2 cups of syrup.

Light Syrup (Simple Syrup)

2 cups sugar ( or 1 cup sugar + 1 cup honey, for example )

4 cups water

Medium Syrup

2 & 3/4 cup sugar ( gee, I wish I knew how to do the little fraction do-hickey on this computer)

3 & 1/2 cups water

Heavy Syrup

3 & 1/2 cups sugar

3 cups water

Procedure:

1. Mix the sugar and water in a pan and let it soak for about 10 minutes without heat.

2. Over low heat, stir the mixture until the sugar dissolves.

3. Increase the heat to bring the mixture to a boil. Just briefly to get rid of the gritty texture.

4. Lower the heat and keep warm until you are ready to use it.

Other in the beginning canning series:

How To Make Jam — A Beginner Tutorial

How To Make Jam — The Canning Supplies

How To Make Jam — The Easy Canning Process

Strawberry-Rhubarb Jam — without added pectin

Strawberry Lemonade

How To Make Jam — The Easy Canning Process


I’m ever so happy to see you today. Grab a cup of coffee and join me in the kitchen for our beginner canning tutorial.

Okay, so you’ve tried your little test batch, adjusted the sugar and are ready to can like crazy. Just wait ’til you open one of your long term storage jars on some blustrous winter morning. All the tastes of Summer. Yum!

Here were the first steps, in case you missed them:

How To Make Jam — A Beginner Tutorial

How To Make Jam — The Canning Supplies

Here we go:

1. Wash everything.

Every pot, spoon, tong, tool, jar, dome lid and band. Plus, every surface you might possibly use.

2. Place mostly dried jars, on their sides, in a slow oven ( 200 degrees Fahrenheit ) for one hour to sterilize a load of jar at once.

3. Meanwhile place all the tools, dome lids and bands in a pot of water no cooler than 180 degrees Farenheit for no less than 15 minutes.

3a. Set stock pot of water for water bath on high so it comes to a boil just before, your jars go into it. Yeah, this can take a while.

4. Make the jam of your choice.

5. After you skim any foam from the surface, pour the wicked hot jam into jars, using a canning funnel to keep things clean. This is called hot packing.

6. Using the magnetic lid lifter, place a dome lid on each hot jar.

7. Using the magnetic lid lifter to remove the bands from the scalding water, place them over each band.

8. Dip your hands in a giant bowl of ice water for a moment and screw on each band. Use a jar wrench to tighten, if you have one.

Note: If you have delicate hands, you may need to thrust your hands back into the icewater between each jar you tighten.

9. Place the jars into the boiling water bath.

Note: there should either be a canning rack or a bunch of band lids on the bottom of the water bath to prevent the jars from directly touching the bottom of the pot. Also, there should be at least 1 inch of water above the tops of the jars.

10. Process for 15 minutes.

Yup, that just means leave the jars in the boiling water bath for 15 minutes.

Altitude adjustment: For every 1000 ft. you are above sea level, add 1 minute.

So for example: I live at 1050 ft. so I process my jam for 16 minutes. High Mountain Muse probably processes hers for a year and a half way up there on her mountain top.

11. Using the jar lifters, take the jars out of the water and set them to cool on whatever clean flat surface is left.

12. As the jars cool listen for that delightful popping sound of each jar sealing. You can tell it is sealed when you run your finger over the dome lid and it has sucked down. Man, that is a satisfying sound!

There is nothing more satisfying than seeing a rainbow of sparkly jams all set to nourish your family until next canning season.

Now, who’s baking the biscuits?

How To Make Jam — The Canning Supplies


Well, hello there. I’m so glad you could join me today. Grab a cup of coffee and join me in the kitchen as we discuss the canning supplies nescessary for processing your fresh, delicious jams

Because fruits are high in acid they can safely canned for long term storage using the water bath method.

Here’s what you’ll need:

canning jars (reusable )

dome lids (the flat part of the lid — not reuseable)

bands (the screw on part of the lid — is reusable)

a deep sauce or stock pot ( non aluminum/ non reactive ) depending on the batch size — by the time I am using a recipe with 4 cups of crushed fruit or more, I use the stock pot.

Another large stock pot ( for the boiling water bath) — you want a pot big enough to hold all the jars of a single batch without the jars being jammed in. Plus, enough room to cover the jar with about an inch or two of boiling water.

With the stock pot water bath method, you will need something to keep the jars from touching the bottom of the pot. I have found that lining the bottom of the pot with band lids, laying/lying (?) flat works beautifully for this

If you actually have a canner, make sure to use the rack provided.

A canning set — inexpensive and you’ll have it for life — includes funnel, jar wrench, lid lifter, tongs and jar lifter.

Yes, you can do the whole process with just tongs, but, oh my ,how those other things help. I don’t think I could do anywhere near my current volume without the jar lifter, funnel or jar wrench. With just tongs you are far more likely to drop your beautifully canned goodies or worse burn the tar out of yourself.

Get everything well cleaned in hot sudsy water and then we will discuss the process itself. It’s very easy. Organization and cleanliness are the key.

So get scrubbing and meet me back here in a bit and we’ll can.

Any canners out there, did I forget anything. Please feel free to add you hints and tips.

Here are the other articles in this series, in case you missed them:

How To Make Jam — A Beginner Tutorial

How To Make Jam — The Easy Canning Process

Blubarb Jam — Blueberry Rhubarb Jam without added pecti

Strawberry-Rhubarb Jam — without added pectin

How to Raw Pack Fruit With Simple Syrup

A Ton of Garden, A Tiny Space: 100 pounds of potatoes in 4 Square Feet


After you grab a glass of Strawberry Lemonade from the refrigerator, get your tools.

My mom shipped my this nifty link for really high yield potatoes in a tiny footprint.

Go ahead give it a try.

100 pounds of potatoes in 4 square feet

Neighborly Advice Vol. 5: Neighboorhood Gone Wild With Free Food


A. Onion Grass  B. Mint  C. Violets  D. Dandelion

A. Onion Grass B. Mint C. Violets D. Dandelion

With beginner articles on Mason Bees; Mushrooms; Crystallized Edible Flowers and Fruits; Dandelion Bread, Soup, Salad, Casserole and Wine; Violet Jelly; Sugared Violets; Stuffed Wild Grape Leaves; Outdoorsy Kid Activities, you could say we’ve gone a little wild this week. Join your neighbors for a new adventure!

Congratulations to Jen Neff, the only one to get all 4 correct in the You’re Eating WHAT From Your Lawn Quiz.

After we harvest some wild goodies, let’s head into the kitchen to make a feast from our foraged finds.  Don’t be afraid.  Open your palate to something new.  We’re all adults here.  If we are brave enough to step out of our comfort zone, then we open ourselves to a whole new world of learning, adventure and … well, free gourmet food.

In The Kitchen/ Into The Wild

Surfer Sam inspired the creative juices for this weeks edition with the following comprehensive article.

Everything Mushrooms — varieties, recipes, etc.

Langdon Cook’s new book, Fat of the Land: Adventures of A 21st Century Forager sounds like my kind of adventure. From his blog we have…

Dandy Muffins and Bread

Here are more dandelion recipes from all over…

Dandelion Fritters

Dandelion Pesto

Dandelion Soup or Dandelion Salad w/ Eggs or Italian Dandelion Casserole or Dandelion Wine

And just look at all the fun we can have with violets.

Violet Jelly

Sugared Violets

Crystallized Edible Flowers and Fruits

I am particularly eager to try the two recipes that follow as I have never tried either.

Stuffed Wild Grape Leaves

Simple Delicious Fiddlehead Fern Recipe

Waiting to be mounted to get morning sun, afternoon shade, one of my semi-homemade mason bee homes.  Attracting more pollinators means more garden goodies!

Waiting to be mounted to get morning sun, afternoon shade, one of my semi-homemade mason bee homes. Attracting more pollinators means more garden goodies!

In The Backyard Barnyard

How to Build a Mason ( Orchard ) Bee House

Beneficial Bugs: Mason Bees

Attracting Pollinators

Mason Bees

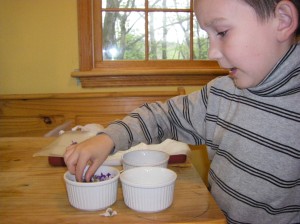
Shaw, age 6, explains how to make candied violets.

Shaw, age 6, explains how to make candied violets.

Up In The Tree House

Make Your Own Printable Birthday Cards

Candied Violets — So Easy A Child Could Do It

Sorry for the quickie edition

In case you missed the past editions, here are the links:

Neighborly Advice Vol 1pizza dough, making jam, using a pressure cooker, learning to knit, rescuing lost stitches, adding goats to your backyard

Neighborly Advice Vol 2 — kool-aid dye, spinning wool, kids’ activities, natural egg dyes, keeping chickens, line drying clothes, making applesauce, finding your sanity, pickling eggs, frugal groceries, growing peas, tomatoes and even worms

Neighborly Advice Vol 3 — grocery budgets, foraging free food, starting a garden, seed tape, hemming pants, chickens, turkeys, fruit trees, goat cheese, fermentation, kid’s activities and my favorite book sale

Neighborly Advice Vol 4 — making marshmallows, starting a garden, planting potatoes, herbs and onions, charming row markers, slow-roasted tomatoes, foraging free food, kids’ activity to-do list, 100 ways to cook eggs, tabletop gardening, and even starting an aquarium

Planting Soybeans (Edamame) Quick Guide


Just a quickie about planting soybeans (edamame ) in the garden.

Soybean (edamame) spacing —  After last frost at about the same time as corn

If possible, soak seeds overnight to help germination.

Saying is: “if it is dry don’t even try.”

Plant about 1″deep.

In containers: 2″ spacing

In Rows: 6-10 seeds per foot with 15-30″ between rows

Intensive deep bed: Spread (scatter) seeds evenly to create about 3-4″ between plants in any direction  ( This one is an estimate.  It leaves more spacing due to lack of rows, but also nearly eliminates the need to weed after decent leaf developement

Square foot: 16 per square  ( possibly more )

Farm seeding rate: 80 pounds per acre

For higher yield and more nitrogen for the soil, try inoculating them.  Outstanding for crop rotation or in the planting season before introducing an orchard.

Sorry just a quickie, but I kept getting searches for this. In my zone, this is still 3 week away in my notes.